


How To: Upgrade your Equipment Feet
Monday, 8th August 2022
As well as your speaker stands and equipment supports, the feet on your components themselves have an important part to play in achieving good sound from your system.
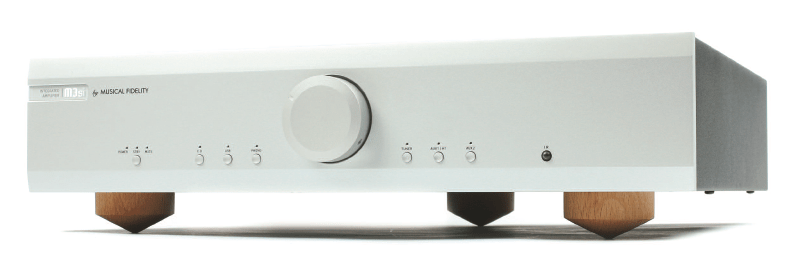
If you think the difference that feet contribute to the sound is too small to notice, try the cushion test: slip a cushion between your CD player or streamer and the surface it stands on. Play a few seconds of music, then take the cushion away and play the same music again. You should hear a big difference between ‘cushion in’ and cushion out’.
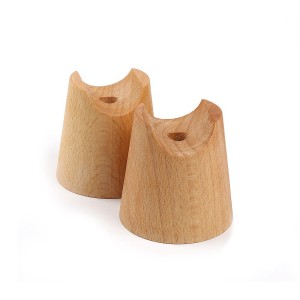
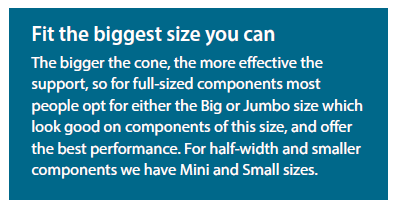 Our wooden Cone Feet have been chosen to optimise the support of your kit. In developing them, Russ tested a number of materials, including steel, aluminium, titanium, stainless steel, brass, ceramics and carbon fibre, before eventually settling on wood. All of the materials tested sounded different because the sonic signature of the material changed the feedback frequency response, but he found that wood (hardwood) distorted the sound the least and its sonic character was the most ‘natural’. He also discovered that the cone shape is the most effective for channelling energy out of equipment, and the larger the diameter of cone, the better it works.
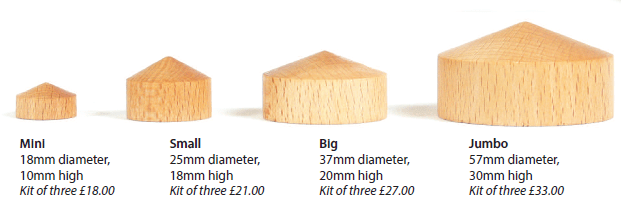
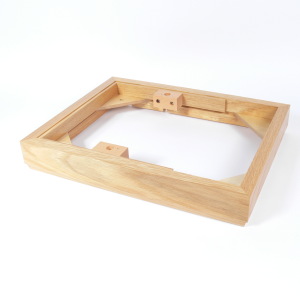
Whether you use our full Torlyte equipment support or one from another manufacturer, and / or a Torlyte Platform or not, it’s very beneficial to support your equipment on our Cone Feet. So, that’s the background – but how do you go about fitting them?
Use three feet
 Stability is key and is the reason we recommend using three feet. Whilst they may look more solid, four feet actually allow micro-rocking. If you’ve ever sat at a four legged cafe table, on an uneven floor, you’ll get an idea of what we’re talking about. Even if the rocking action is very small, in this situation (dumping energy) it is very significant. By using three feet (two placed at the front, one at the back), you create a stable triangle and prevent information loss. This is also why camera tripods have three legs – stability is as crucial for talking a photo as for reproducing music!
We recommend putting a cone under each front corner and one in the middle at the back.
Cone Feet can also be supplied in kits of four if you have to use four feet, though the performance isn’t as good as supporting with three.
Fit them so they connect to the casework, not under the existing feet
The principle of our Cone Feet is that they need to couple your equipment’s casework to your equipment rack. For that reason, you should not fit them under the existing feet. The correct position will probably be to the side or just behind the two existing front feet; the one at the back should be positioned bet ween the two rear feet. You might find that the one at the back needs to be off-centre to counterbalance the weight if your component is fitted with a transformer off to one side.
Make sure the cones lift your component off its original feet
You may be able to remove your equipment’s existing feet if they have easily accessible screws, but no problem if you can’t; just make sure that the size of Cone you choose is high enough to ensure clearance of the original foot. The cone sizes are below.
Point up or point down?
Whether you fit your Cone Feet point up or point down isn’t crucial as they will work well both ways, though we tend to recommend point down, and we also think they look better like this.
If fitting the cones point down, you don’t have to secure them to the casework - the weight of your component should hold them in place unless it is very light. If you can secure them, however, do.
The best way is to use a small quantity of SuperGlue or araldite; these are hard-setting glues which do not compromise the cones’ performance. They also have a low sheer strength and can be easily removed by giving them a sharp tap sideways if necessary.
Click here to buy Cone Feet
Written By John Armer


