


Home > Other Good Stuff > Turntable mats, belts & accessories > Linn LP12 accessories > VP Revolution 2 Speed Power Supply for the LP12
VP Revolution 2 Speed Power Supply for the LP12
5 out of 5
Superior Power Supply for the LP12
We were contacted recently by Mark Sears of VP, who supplies the excellent VP stylus DustBusters to us. Mark is an inveterate Linn LP12 tweaker and he was keen for Russ to have a listen to his newly-designed LP12 power supply.
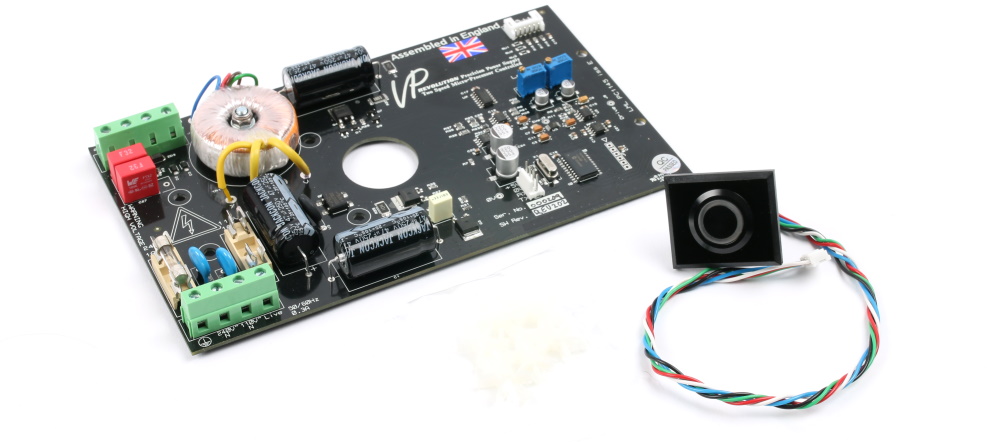
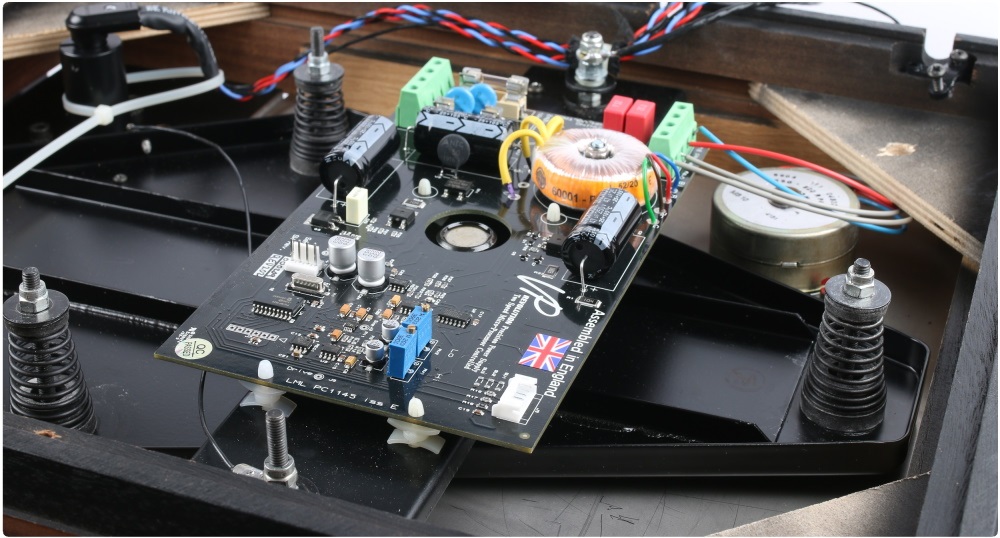
The VP Revolution Power Supply is a high performance, two-speed supply designed to replace internal power supplies fitted to the LP12, such as the Valhalla and other after-market internal power supplies. As long as your LP12 is fitted with the original 24p motor, the VP Revolution can be fitted. We duly received our sample and Russ couldn’t wait to get his hands on it and put it through its paces. And the result? Russ loved it, finding it sounded natural and clear when installed on his own LP12.
Russ says...
I have an LP12 at home with a Valhalla power supply (albeit with my own upgrades to the original Linn design) and so I was sceptical whether this new supply would bring about an improvement.
Fitting was straight forward, and from the off it was clear that this supply was an upgrade. Bass was clearer and better defined; it went deeper and was more tuneful. The whole effect was to give a sound that was clearly better – it was more musical and delivered a more enjoyable performance.
Specifications
- Internal 2 speed microprocessor controlled LP12 power supply designed to exceed the performance of both internal and external power supplies
- Latest surface-mount, low-noise component technology
- Microprocessor-controlled for smooth low-voltage motor
- Toroidal transformer based
- 240v and 110v compatible
- Switchable 33/45 RPM operation
- Wow and flutter better than 0.06%
- Supplied with mounting hardware, and basic instructions designed to be fitted by the competent DIYer – no soldering required.
- 12 month warranty
Money Back Guarantee

Don't forget! We are so confident in the performance of this product that it is covered by our 14 Day Home Equipment Trial with Money Back Guarantee. Buy the product and if you're not completely satisfied, you can return it within 2 weeks for a refund. For full details click here.
Fitting the VP Revolution PSU
We've produced a simple guide below showing how easy it is to fit the VP Revolution power supply.
Before undertaking any modification, please ensure you completely disconnect your LP12 from the mains supply and leave for 45 minutes for any current and voltage to discharge.
We take no responsibility for any damage caused by the miss-installation of the power supply. This guide is purely for reference purposes only. Your LP12 may look a little different to ours, but the method is the same.
To aid with the installation of the power supply an LP12 jig is extremely useful. Although an official jig is quite expensive it’s a good investment to make as it will help servicing and upgrading your LP12 much easier. There are however, plenty of DIY and innovative alternatives if you search online.
Tools required
LP12 Jig (optional)
Linn LP12 Bearing Housing Cap
3mm Flat bladed screwdriver
Pliers
M5 Eyelet for earth connection to cross brace
Some dexterity and patience
Examples of what your LP12 may look like underneath.
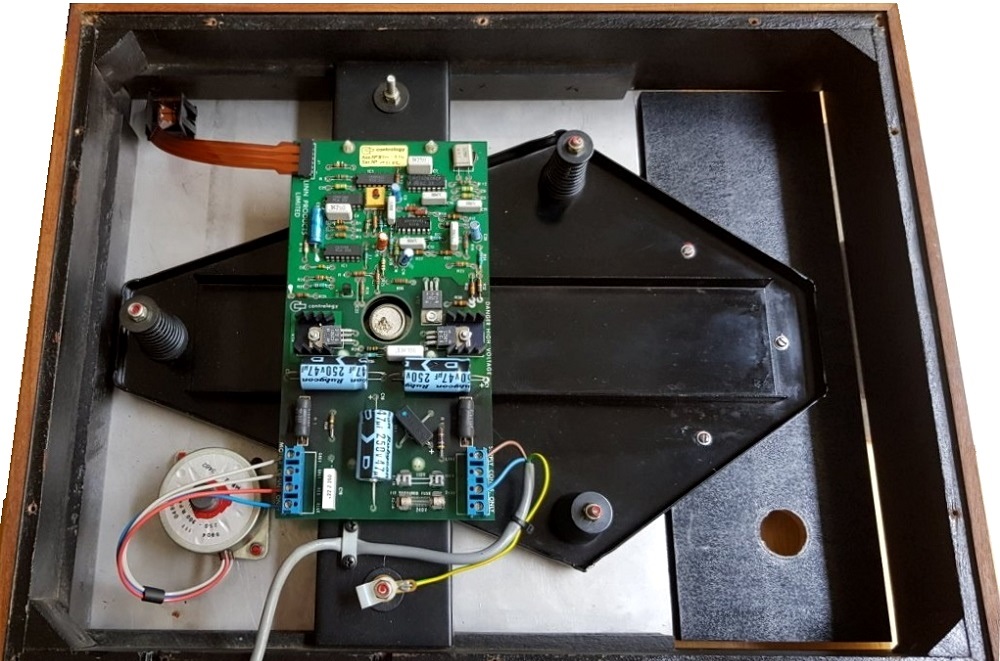
LP12 fitted with Hercules power supply.
LP12 fitted with Lingo power supply.
Step 1
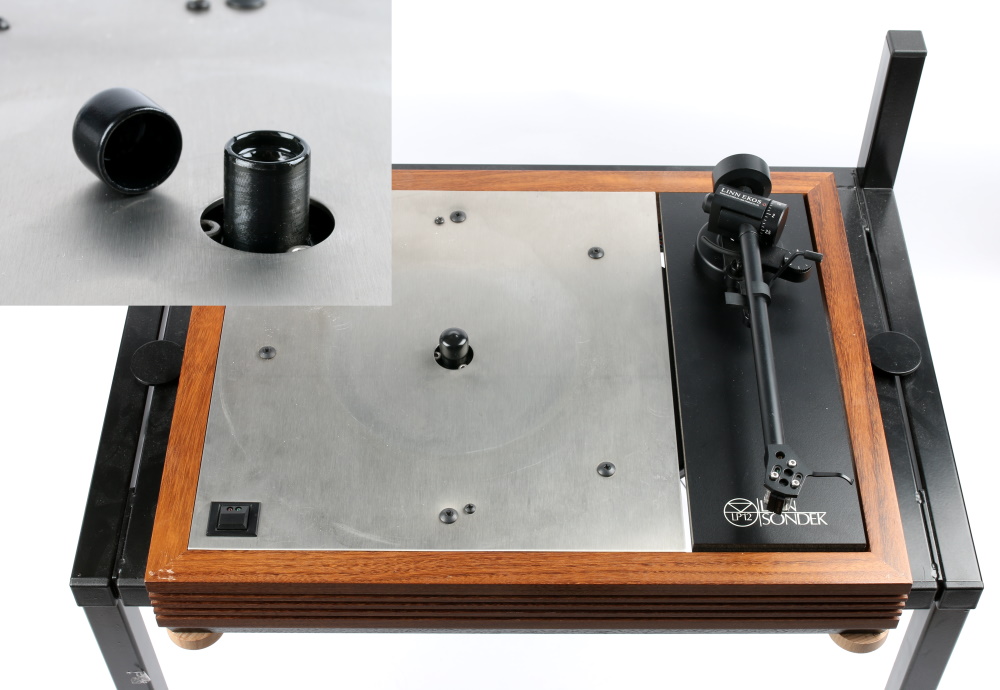
Remove the Outer Platter and the turntable belt. Then remove the Inner platter and store safe safely to one side.
Fit the Bearing Housing Cap onto the motor bearing ensuring it’s on tightly so no oil can escape.
Step 2
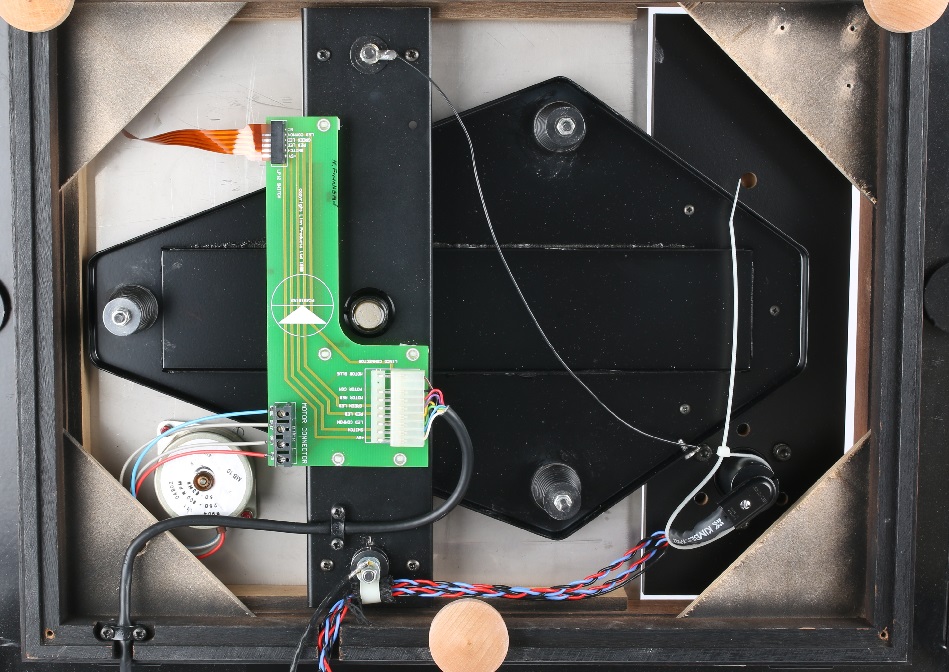
Now it’s time to access underneath. Remove the Base Board (if fitted). Disconnect the power, motor and switch cables using the flat bladed screwdriver.
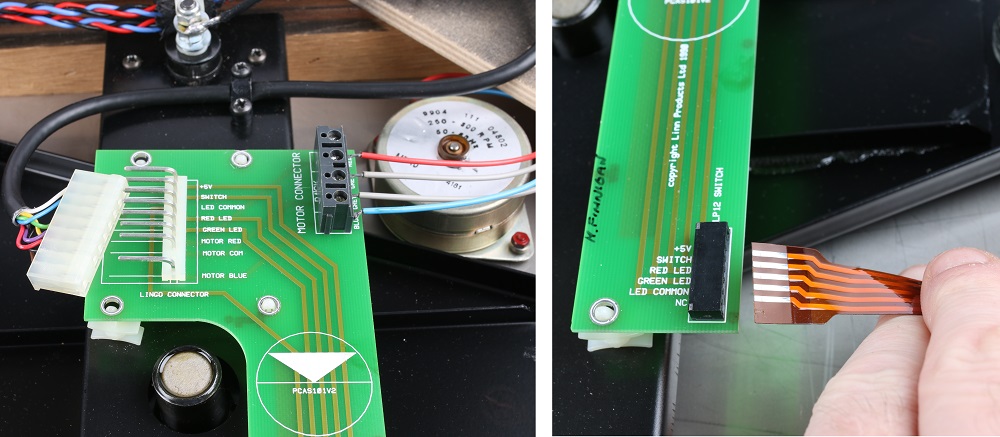
Remove the original board from the Cross Brace. It can be helpful to use pliers at this point to gently squeeze the two parts of the white, plastic standoffs together. Don’t worry if any break. A new set is included with the VP Revolution power supply.
Step 3
Removing the original switch.
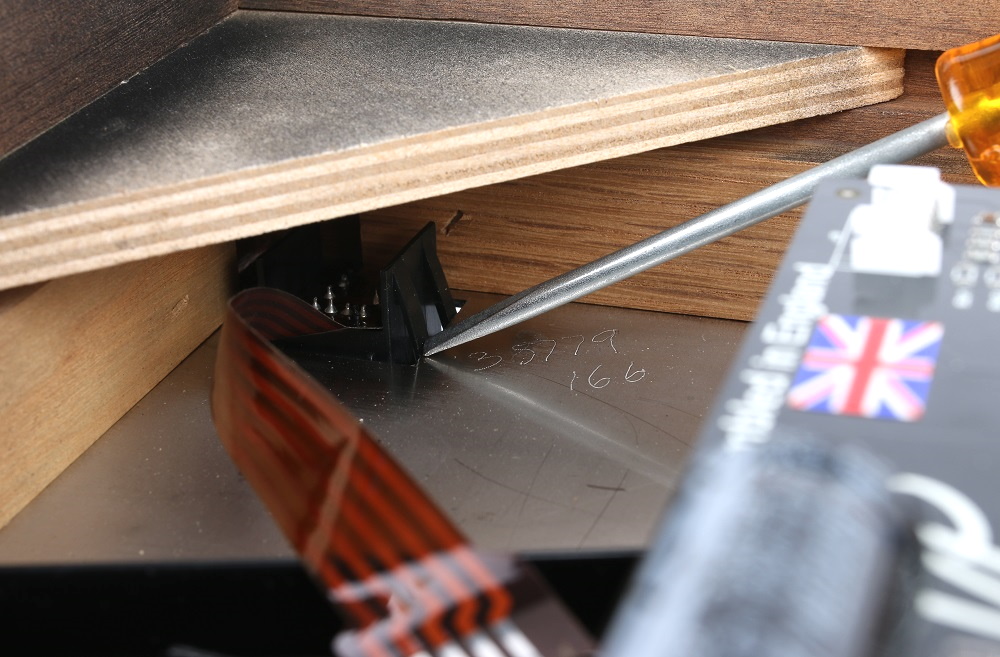
Depending on the type of corner braces your Plinth has, this can be the trickiest part of the upgrade. This is where you’ll a flat bladed screwdriver, patience and dexterity. Gently push in the holding clips while pushing down from the inside.
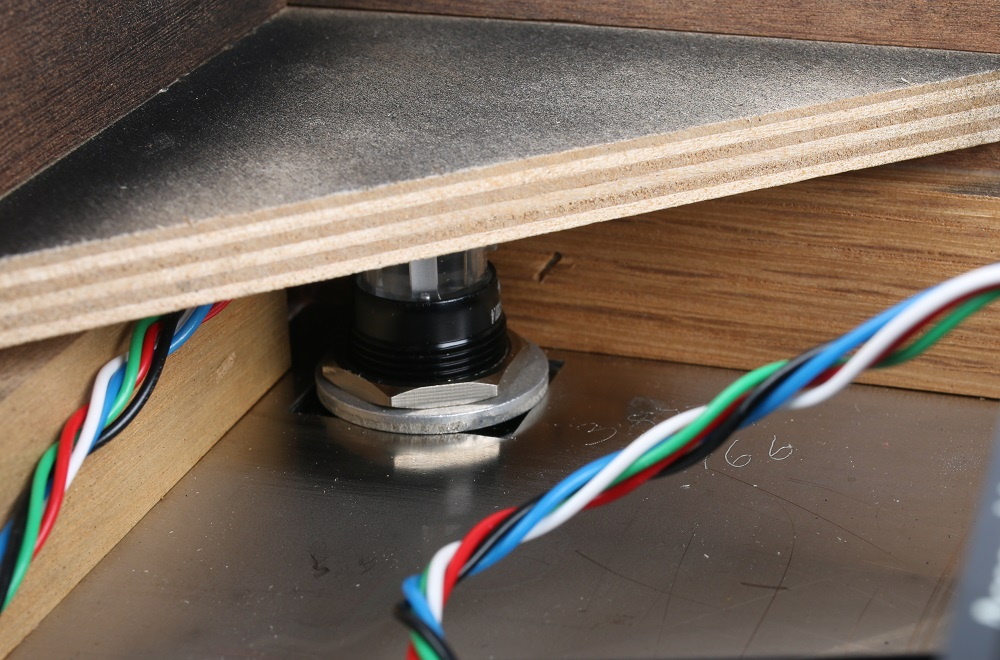
Step 4
Fit the new Switch ensuring it’s properly seated in the Top Plate. The washer goes on first and then the nut. Tighten by hand or use a spanner. Do not overtighten.
Clip on the VP Revolution power supply board to the cross brace, ensuring all stand-offs are used to attach the board.
Step 5
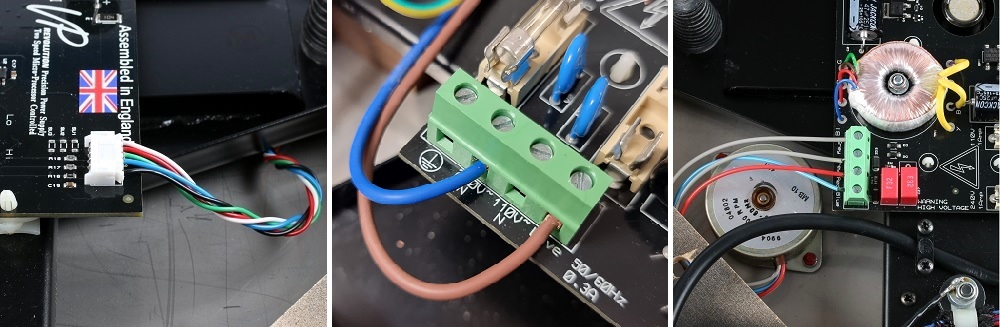
Now it’s time to reconnect the cables.
IMPORTANT
When reconnecting the power and motor wires, it is critical you observe the colour coding and connect correctly! Failure to do so may cause damage. Double check and then re-check!
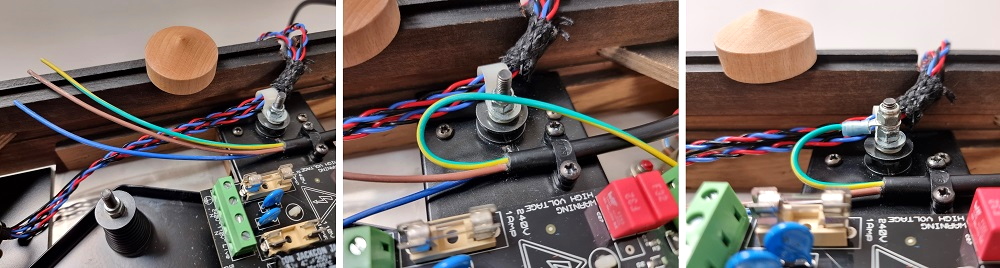
Above shows how to wire the mains cable and earth. The earth MUST be attached to the cross brace. We recommend attaching an M5 eyelet to the earth and then to the cross brace.
Step 5
Your newly installed VP Revolution should now look like this.
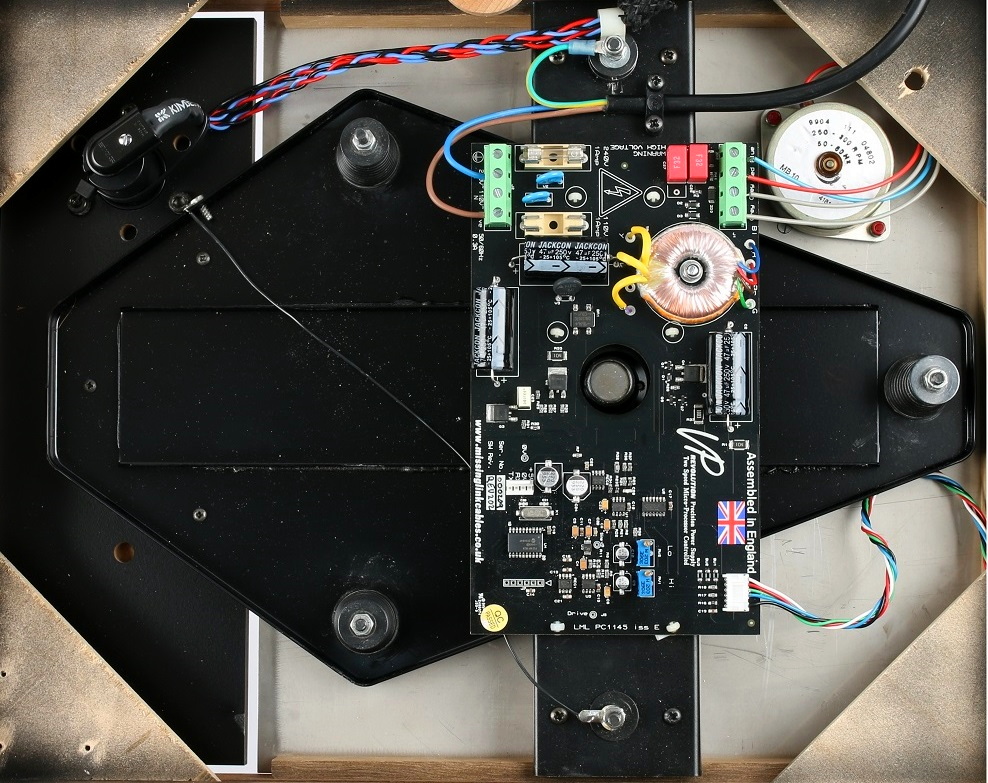
Before re-fitting the Baseboard, tidy up any cables and re-check your wiring. Once your satisfied, put your LP12 back together again (platter, belt etc..).
Customer Reviews
Overall product rating
5 / 5
5 / 5
reviewed by Justin
19 Dec 2022
Yes, I recommend this product.
"Simply The Best"
This is hands down the last word in AC synchronous motor control. I have tried them all and this can be adjusted to the accuracy of 100th of a Hert. No other power supply delivers this level of control and accuracy. My deck runs with supreme speed stability as a result.


X
