


High End on a Budget.
Wednesday, 20th May 2020
Simon Dalton discovers that, when it comes to achieving a high-end sound, you really don’t have to spend a fortune.
It’s very easy to be drawn into thinking that you need the very latest, top flight components in order to get anything near that elusive audiophile performance you’re after.
That’s not to say that better components won’t make a difference, but
a. there is no necessary link between spending more and achieving a better sound (we’ve all heard expensive kit that sounds awful), and
b. if you choose carefully, you can source competitively priced components that sound really good. The question then becomes one of knowing the right kit to go for…
 Back in 2017, we included a couple of articles from the respected reviewer, editor and all-round Hi-Fi authority David Price in our Connected magazine. In these, he went through a number of examples of second-hand Hi-Fi that still give excellent, musical results without the hefty price tag. David has long been an enthusiastic proponent of classic Hi-Fi and his own website zstereo.co.uk forms an excellent resource for classic, quirky and long-forgotten components (you can read the two articles by clicking here).
Reading through his articles reminded me of what a serious alternative buying second hand is. I speak from personal experience. I am currently running a Rotel RC/RB-1070 pre/power combination fed from two sources; an Arcam Alpha 6+ CD player, and a Russ Andrews DAC-1 DAC (used for streaming Tidal, Qobuz and Spotify). The Russ Andrews two-way loudspeakers are the icing on the cake.
In other words, we are not talking high-end esoterica here, but with the right infrastructure in place - R.A. Reference and Signature PowerKords / R.A. Crystal-Ag and Kimber Hero MiniZap interconnects / Kimber Monocle XL speaker cables, all with Super Burn-in of course - it sounds wonderful!
The money saved over the purchase of new kit gives a number of options for the enthusiast.
There’s the obvious choice of whether to use the savings to simply ‘save money’ or to go a notch up in the level of Hi-Fi components you are considering.
One thing’s for sure; if you save money on the hardware and invest in the infrastructure to support it, you won’t go far wrong.
So, what to buy and what to spend on the infrastructure?
David’s articles feature a number of good recommendations for used Hi-Fi, as does his aforementioned website. General Google searches will likewise present a number of options. But what about the infrastructure? How much should you spend? And in what order?
The principles are exactly the same for second-hand or older systems as they are for any other, but they are worth reiterating. Always upgrade your cables in the following order:
1. Mains
2. Interconnects
3. Speaker cable
The reason for this is that every stage affects the next. The easiest way to illustrate this is to use the example of doing the opposite.
Let’s say you start with the speaker cable. This will, of course, bring benefits. The problem is that the reason you get the benefit is the same reason you’ll get potential problems too. For example, the cable may be more resolving and bring out more detail from the recording. But if it can do that, it will also highlight any issues with signal noise and mains interference further downstream, and this will colour the sound. In contrast, if you address the mains first, by the time you come to improving your speaker cable you’ll only hear a benefit.
An example
We’ve taken a simple, widely available system that we have here at RAHQ and suggested the first level of upgrades we’d make. The system comprises; a Marantz PM66SE KI Signature integrated amp, an Arcam Alpha 7SE CD player and Focal 705 stand-mount loudspeakers.
1. Following the above advice, we start by upgrading the power cable feeding the CD player. Always try to start by upgrading this cable first because this is literally the source of your music – the closer to that you get, the more significant the improvement. Think of it this way; you can never get back what you’ve lost, so any improvements at the source will be reflected throughout the rest of the system.
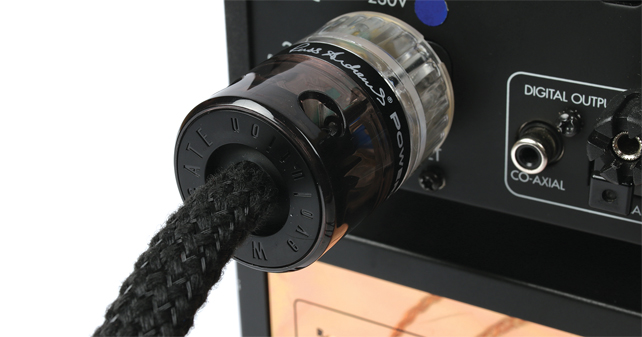
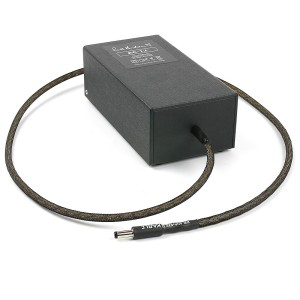
Evolution-100 PowerKord upgrade to the CD Player
2. The next step is the power lead to the amp. We decided to treat ourselves a bit by fitting an Evolution-100 PowerKord) to the CD and a YellO Power on the amp, though if you are just starting off, you could always fit a YellO to each and move up the range using our cable upgrade scheme at a later date.
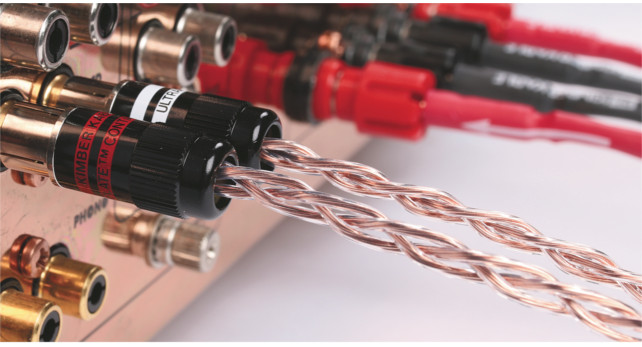
Kimber Timbre analogue interconnect
3. Choose a better quality interconnect at this point, to connect your CD to the amp. Kimber’s Tonik analogue interconnect is a great starter cable, but we’ve gone for the Kimber Timbre here. It’s not a lot more money but the improvement in materials is well worth the additional investment and will reward you with its sonic performance.
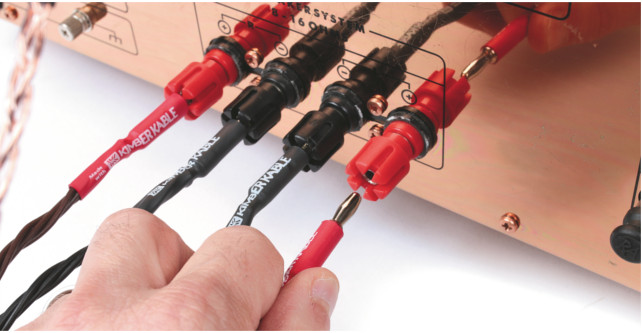
Kimber 4PR speaker cable
4. The last step for this round of upgrades is to replace the wire feeding your speakers. As I said above, having made the previous improvements, the better quality speaker cable will be far more capable of reflecting these. Starting from the beginning of the Kimber range, we’ve plumped for the excellent 4PR here. If you are using floor-standing speakers – or even just because your budget allows – go for 8PR. The doubling of the conductors is an advantage when driving larger speakers but they will also bring more out of your stand-mounts too.
Once you’ve gone through this process, you can return to the beginning and start again by upgrading the mains cables, then the interconnects, and so on. Now is also a good opportunity to upgrade the mains extension feeding your system. Our first step for this level of kit would be to fit the PowerBar-S, along with a YellO Power or Evolution-100.
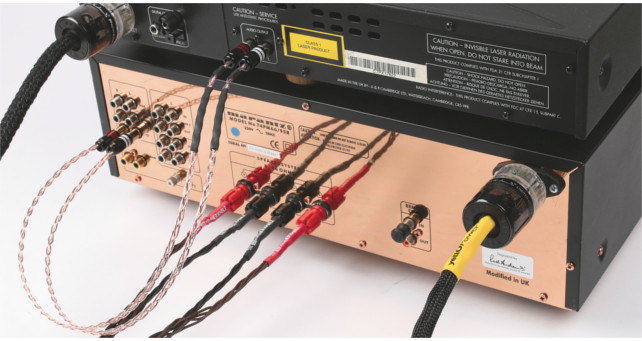
The completed upgrade, including a YellO Power to the amp
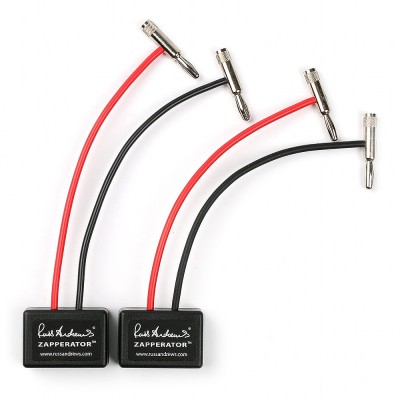
Alternatively, you could take the opportunity to add some filtration,
such as a Silencer or Mains Zapperator.
When do I know when to stop upgrading?
The answer to this is really quite simple: when you stop hearing any improvements.
That’s one of the reasons we have the 60-Day, Money-Back Guarantee; you get the chance to judge this for yourself and, if and when you find there is little improvement over your existing product, you can simply return the new one for a refund and stop there.
Written By Simon Dalton


